Showing posts with label Pembangunan Sistem. Show all posts

Wednesday, June 03, 2015

Mystile: Change Recent Products in Woocommerce


kalau nak tukar recent product kat woocomerce dalam wordpress kena la edit sket function kat dalam coding di

Mystile: theme-woocommerce.php (includes/theme-woocommerce.php)


Caranya :

Dashboard -> Appearance ->Editor -> ->Template ->

theme-woocommerce.php


Bahagian 

function mystile_recent_products() {
global $woo_options;
if (class_exists('woocommerce') && $woo_options[ 'woo_homepage_products' ] == "true" ) {
echo '

'.__('Recent Products-Test', 'woothemes').'

';
$productsperpage = $woo_options['woo_homepage_products_perpage'];
echo do_shortcode('[recent_products per_page="'.$productsperpage.'"]');
} // End query to see if products should be displayed
}

Monday, September 15, 2014

Redmine - Mobile Setup

Untuk akses dari iPad/iPhone atau Android
Configure
  1. API requires authentication. 
  2. To enable the API-style authentication, 
  3. you have to check Enable REST API in Administration -> Settings -> Authentication

Saturday, September 06, 2014

Persediaan Menggunakan Redmine - Part 1

Apabila dah install redmine, kita pun nak cari macammana nak guna redmine ini. Adoi hai ... cari-cari kat Pakcik Googe ... so yang ni saya cuba kongsikan

Pengenalan

Apa itu Redmine daripada http://en.wikipedia.org/wiki/Redmine

Redmine is a free and open source, web-based project management and bug-tracking tool. It includes a calendar and Gantt charts to aid visual representation of projects and their deadlines. It handles multiple projects.

Apakah Redmine itu ?
Redmine adalah aplikasi opensource? yang digunakan untuk membuat pengurusan projek. Dimana didalamnya ada 

aktiviti yang dibuat
masalah yang dihadapi
jangka masa sesuatu isu diselesaikan
forum 
wiki
dsbnya

Oleh itu banyak yang boleh dibuat untuk merancang sesuatu pekara atau projek samada untuk personal , ofis dsbnya.

Setup yang aku buat untuk redmine aku ... so boleh la mencuba , nanti aku share lagi apa yang aku buat ok ye ...

1. Configure rMagick
sudo apt-get install imagemagick libmagickcore-dev libmagickwand-dev
Then,
gem install rmagick
2. Setup Projek
  1. Create Projek
  2. Add User dalam Settings
  3. Kemaskini isu status
    Ini penting untuk memastikan setiap isu boleh dikemaskini status samada new,close dsbnya
    Administration -> Issue statuses -> kemaskini
    • New utk default value apabila create isu baru
    • Reject atau Closed value Issue Closed di tickkan
    • secara default Issue Closed x tick bermaksud ianya isu masih lagi open.

Tuesday, August 05, 2014

Macamana nak Buat Kotak dalam Blog

Eh ... Katak dalam blog , mana ada orang buat kodok kat blog. Bukan lah ni nak wat kotak dalam blog. So bila nak wat kotak untuk command atau coding senang sket nak cut and paste ... hehehehe , selalu macam tu la ... Nak jadi pandai cara mudah ..

So ini yang aku jumpa dan kongsi :-

Langkah-langkahnya
  1. Yup .. sebelum korang boleh buat kena masuk dalam blog post mode (... korang dah tau .. kan ..)
  2. Klik pada  HTML button pada sisi kiri blog 
  3. Disini semua coding blog dalam bentuk asalnya iaitu dalam bahasa HTML (korang x faham korang google la ..)
  4. Copy code kat bawah ni dan paste kat section yang korang nak buat kotak tu.
<div style="background: #f8f8f8 repeat; border-bottom-left-radius: 0px 0px; border-bottom-right-radius: 0px 0px; border-top-left-radius: 0px 0px; border-top-right-radius: 0px 0px; border: 2px solid #222222; padding: 10px;">

 -- Masukan Teks Anda --

 </div>

Keterangan

Warna Background/Latarbelakang Box
style="background: #f8f8f8 <--- boleh diubah sini

Saiz Border
border: 2px <--- semakin besar nombor semakin tebal border

Jenis Border
border: 2px solid <--- bentuk terdiri daripada dotted , dashed , dash-dotted dan solid

Tuesday, July 15, 2014

Github - Sedia ke Bulan

Memula kita akan create username dan email untuk git. Ini penting sebelum guna git

 git config --global user.name "nama kita" 

oit jangan dibubuh sekali dengan tanda " " tu


Contoh macam ni la:


git config --global user.name teratakbuluh


Ini untuk mengetahui siapa yang meng'commit' sesuatu projek.So nanti kalau dah ramai senang nak tau sapa yang 'commit' dalam projek.


Daftarkan email yang kita signed up kat akaun GitHub.com .


git config --global user.email "your_email@youremail.com"


Lepas tu kita langkah seterusnya

Masuk ke folder yang disediakan untuk di 'keep track' perubahan yang nak di detect.
Atau sediakan satu folder khusus.

Gunakan command 


git init 


untuk memaklumkan ini adalah local repositori yang mana sebarang prubahan yang dibuat akan disimpan dalam github


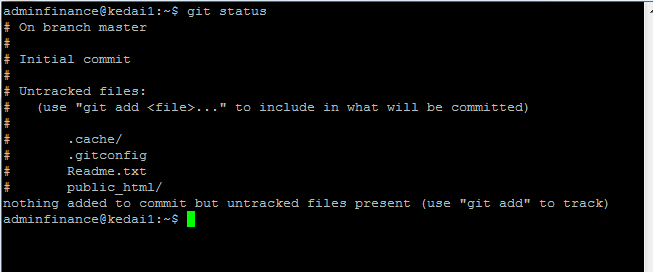
Apakah status git,gunakan command


git status


lah skang kita lihat status git yg dh dibuat tadi.


Sekarang masanya untuk masukan file dan folder kedalam local repository,aku suka add semua ... bukan apa takut terlupa so command aku biasanya

git add  *

atau korang boleh masukan satu satu fail

git add Readme.txt

Kemudian commit dan masukan maklumat atau teks yang memberi pengenalan terhadap perubahan yang dibuat.

git commit -m "Bismillahirahmanirahim ... Mulakan Projek"

Untuk push local repository ke github.com

git remote add origin https://github.com/jamalparit/laravel.git


git push -u origin master

GITHub - Pengenalan

Apa itu GITHub

Selalu selalunya bila kita buat sesuatu yang memerlukan duplikasi, kita akan copy file dan letakan filename.
Biasanya kita bubuh tarikh atau bilangan nombor. Cth:-

Ini akan memakan space dan masa untuk mencari dan membuat perubahan. Kalau dalam office autmation pun dah features yg keep track any changes yang kita buat perubahan pada sesuatu dokumen. Akan tetapi terdapat masalah bila ianya melibat dokumen yang banyak dan orang yang ramai terlibat dalam penyediaan dokumen.

Inilah yang berlaku dalam pekerjaan aku ni. Huh letih tul la. So hari ini nak try GitHub dah selalu dengar tapi tidak pernah mencuba. So inilah dia

Bila kita guna

Dimana nak dapat

Cara Installasi

First Time Guna

Monday, October 09, 2006

Let's Learn VI (Powerful Text Editor For Linux)

This basic command VI (powerful text editor for Linux user in commandline). I like to remember and practice the command.

Starting an Editing Session

vi filename - where filename is the name of the file to be edited.

Undo Command
u undo the last command.

Screen Commands

CTL/l
Reprints current screen.
CTL/L
Exposes one more line at top of screen.
CTL/E
Exposes one more line at bottom of screen.
CTL/F
Pages forward one screen.
CTL/B
Pages back one screen.
CTL/D
Pages down half screen.
CTL/U
Pages up half screen.

Cursor Positioning Commands
j Moves cursor down one line, same column.
k Moves cursor up one line, same column.
h Moves cursor back one character.
l Moves cursor forward one character.
RET Moves cursor to beginning of next line.
0 Moves cursor to beginning of current line.
$ Moves cursor to end of current line.
SPACE Moves cursor forward one character.
nG Moves cursor to beginning of line n. Default is last line of file.
0 Moves the cursor to the first character of the line.
:n Moves cursor to beginning of line n.
b Moves the cursor backward to the beginning of the previous word.
e Moves the cursor backward to the end of the previous word.
w Moves the cursor forward to the next word.

/pattern Moves cursor forward to next occurrence of pattern.
?pattern Moves cursor backward to next occurrence of pattern.
n Repeats last / or ? pattern search.

Text Insertion Commands

a Appends text after cursor. Terminated by escape key.
A Appends text at the end of the line. Terminated the escape key.
i Inserts text before cursor. Terminated by the escape key.
I Inserts text at the beginning of the line. Terminated by the escape key.
o Opens new line below the current line for text insertion. Terminated by the escape key.
O Opens new line above the current line for text insertion. Terminated by the escape key.
DEL Overwrites last character during text insertion.
ESC Stops text insertion. The escape key on the DECstations is the F11 key.

Text Deletion Commands

x Deletes current character.
dd Deletes current line.
dw Deletes the current word.
d) Deletes the rest of the current sentence.
D, d$ Deletes from cursor to end of line.
P Puts back text from the previous delete.

Changing Commands

cw Changes characters of current word until stopped with escape key.
c$ Changes text up to the end of the line.
C, cc Changes remaining text on current line until stopped by pressing the escape key.
~ Changes case of current character.
xp Transposes current and following characters.
J Joins current line with next line.
s Deletes the current character and goes into the insertion mode.
rx Replaces current character with x.
R Replaces the following characters until terminated with the escape key.

Cut and Paste Commands

yy Puts the current line in a buffer. Does not delete the line from its current position.
p Places the line in the buffer after the current position of the cursor.

Appending Files into Current File

:R filename
Inserts the file filename where the cursor was before the ``:'' was typed.

Exiting vi

ZZ Exits vi and saves changes.
:wq Writes changes to current file and quits edit session.
:q! Quits edit session (no changes made).

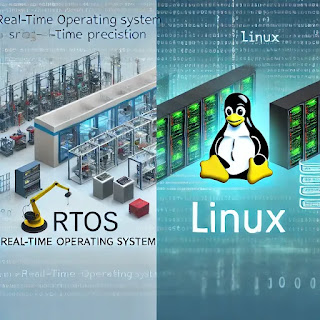
5 Faedah RTOS Linux Kernel - Apa Itu Sistem Operasi Masa Nyata (RTOS) di Malaysia

Di VIENNA dimana selepas 20 Tahun, Real-Time Linux Akhirnya Masuk ke Dalam Kernel Utama Linux. Itulah pada yang memahami bagaimana berkemban...