Melihat perkembangan bisnis online di internet semakin lama semakin pesat.pertanda bahwa bisnis online mempunyai prospek baik kedepannya.malam ini saya mencoba sharing mengenai bisnis online di file hosting.dalam hal ini saya membahas file hosting di freakshare.net.sudah pada tahu kan tentang freakshare.net?.memang di internet banyak sekali situs penyedia file hosting seperti halnya ziddu,mediafire,megaupload,2shared,4shared,dll.namun untuk mendapatkan penghasilan di file hosting,saya rekomendasikan di freakshare.net.ada apa ya?,kenapa ngga ziddu aja?kan udah terbukti membayar dollar.menyikapi pertanyaan tersebut,ziddu sekarang sudah mulai menurun pelayannya.saya sering mengalami error saat download di ziddu dan banyak pop-up bermunculan [maaf ya gan file download-an ane sementara ini masih di ziddu ].
Yap,untuk kedepannya ane usahain pindahin semua ke file hosting yang lebih baik [kalau sempet ].tentunya di freakshare.net.freakshare merupakan alternative lain mendapatkan keuntungan dari setiap file yang didownload dan mengikuti program affiliasinya.tergantung agan maunya yang mana?dua-duanya juga malah lebih bagus.komisi yang kita peroleh dari freakshare bukanlah mata uang $dollar,melainkan €Euro.wow,,malah lebih mantabb lagi gan.detailnya
Earn up to 40 € for 1000 Downloads.
For every advertised Premium Account you earn 1 €
We pay you 10% from the money earned from affiliates who you referred to our Service [1 € = $ 1,22]
min upload 5MB/file,PayOut min 20€Euro [Paypal]
Nah gimana gan,seru kan.daftarnya gratiss,,tiss,,tiss dan tidak membatasi dari negara mana saja boleh kok.Sedikit Tips dari ane: gimana caranya dapetin €€ dengan mudah dan cepat?.pertama,posting keforum-forum besar gan.seperti kaskus danlebih cepetnya lagi gabung di forum luar yang jumlah membernya paling banyak.biasanya di forum negara indya [belasan juta member],china[puluhan juta member,hanya saja bahasanya ngga ngerti kanji semua].dan untuk file yang paling laku didownload adalah file video Por*n* gan :-p .intinya,sebarkan link download freakshare kamu sebanyak-banyaknya dan sertakan file gambar yang menarik pada saat posting,gunanya untuk memancing downloader.biar cepet laku file kita gan .ya sudahlah ngga usah lama-lama lagi deh gan,mending langsung join dan upload filenya+mari berburu Euro bersama-sama.tenang aja gan,gratis sepanjang masa.

Saturday, December 10, 2011
Wednesday, June 08, 2011
OpenFiler 2.99
Summary
This is part 1 in a proof of concept serious involving the creation of a RAID 1 iSCSI Target using OpenFiler 2.13 and Vmware Server 2. We will purposely fail one of the virtual disks in the array rebuild the array and verify the data. In part one of the series we will create the Raid 1 array. In subsequent parts we will create an ISCSI Target, connect Windows Vista using iSCSI Initiator and simulate RAID 1 drive failure and recovery. The OpenFiler vmware appliance is free to download and use. The installation of both Vmware Server 2 and OpenFiler 2.13 vmware appliance will not be covered here.
Create VMware virtual disks
From the VMware Server 2 web administration create two 50 MB disks for the OpenFiler VMware guest accepting the VMware defaults.
Create Raid Partitions
As seen in Figure 1, navigate to openfiler > Volumes > Block Devices and select the first of our newly created disks /dev/sdb.
FIGURE 1: opefiler > Volumes > Block Devices
Create a RAID array partition by selecting Partition Type: “RAID array member” for the entire cylinder range (default) and clicking “Create”. See Figure 2. The resulting RAID partition should like as seen in Figure 3. Repeat the previous steps to create a RAID partition for /dev/sdc
FIGURE 2: opefiler > Volumes > Block Devices > /dev/sdb
FIGURE 3: openfiler > Volumes > Block Devices > /dev/sdb
Create New Raid 1 Array
Once the two raid devices have been created navigate to openfiler > Volumes > Software Raid as seen in Figure 4 below. Select RAID-1 from the drop down menu, leave the chunk size at default, select the two raid devices as seen in Figure 4 and click “Add array”. The resulting raid array information will be displayed as seen in Figure 5.
Figure 4: openfiler > Volumes > Software Raid
Figure 5: openfiler > Volumes > Software Raid
Create New Volume Group
Navigate to openfiler > Volumes > Volume Groups and create the new volume group “volgroupraid001”. If this is not your preferred volume group naming convention, change it to your liking. After entering your “Volume group name”, select our newly created Raid 1 volume /dev/md0 and click “Add volume group” as seen in Figure 6. The resulting Volume Group is displayed as seen in Figure 7.
Figure 6: openfile > Volumes > Volume Groups
Figure 7: openfiler > Volumes > Volume Groups
Create New Volume
Navigate to openfiler > Volume>Add Volume select our “volgroupraid001” volume group, enter the name our new volume “volraid001”, fill in a description, enter the Required Space” (32MB) and be sure to select the proper “Filesystem Type” of iSCSI. Click “Create” when ready. See Figure 8 below. The resulting Volume Group will be as seen in Figure 9.
Figure 8: openfiler > Volume > Add Volume
Figure 9: openfiler > Volumes > Manager Volumes
In our next section we will create the OpenFiler iSCSI Target using our newly created RAID 1 volume.
OpenFiler 2.99 - Attempted to Create Software Raid 1 Array - Failed...
Heres the code you need to get RAID1 working on Openfiler 2.99:
You need to type the following commands into the shell.
Code:
conary update mdadm=openfiler.rpath.org@rpl:devel/2.6.4-0.2-1
This will install the correct mdadm files, once installed type the next command in.
Code:
ln -s /sbin/lvm /usr/sbin/lvm
This ensures that the GUI is populated correctly.
This will then allow you to create all of the software RAID types without issue.
I extracted this info from here: http://www.everything-virtual.com/?p=349
Friday, April 01, 2011
Dionea - Honeypot
Copy N Paste from
http://networkdefense.com.au/2010/06/12/first-experiences-with-dionaea/
After a lot of reading, a few very late nights, and a fair bit of indecision I decided to install Dionaea. It was down to mwcollectd or Dionaea as my next choice for a 30 day test, but I had quite a few issues getting mwcollectd running properly. I think this is mostly due to my lack of experience compiling stuff in linux, and also not understanding what to do when things fail or don't compile as expected. So I moved on and began to follow Markus' extensive Dionaea install documentation.
My first few attempts failed, in epic fashion. Initially for some unknown reason I decided to install Python 3 from testing... even though the documentation says to compile it. This brought up issues with sqlite3, again frustrating but a good learning experience. Follow the doco! In the end I had to make a slight modification to the ./configure script when compiling Dionaea, as Cython was not being found. Other than that the install was very smooth. I installed Dionaea under Debian 64bit, chose KDE graphical install and left the 'Standard System' and 'Desktop Environment' options checked.
I thought it would be a good idea to post the steps I took to install Dionaea, not sure if it is of use to anyone else. It's basically just a rehash of Markus' documentation.
1. Stuff from APT
apt-get install libglib2.0-dev libssl-dev libcurl4-openssl-dev libreadline-dev libsqlite3-dev python-dev libtool automake autoconf build-essential subversion git-core flex bison pkg-config
2. gettext / glib
apt-get install gettext
wget http://ftp.gnome.org/pub/gnome/sources/glib/2.20/glib-2.20.4.tar.bz2
tar xfj glib-2.20.4.tar.bz2
rm glib-2.20.4.tar.bz2
cd glib-2.20.4/
./configure --prefix=/opt/dionaea
make
make install
cd ..
3. liblcfg
git clone git://git.carnivore.it/liblcfg.git liblcfg
cd liblcfg/code
autoreconf -vi
./configure --prefix=/opt/dionaea
make install
cd /usr/local/src
4. libemu
git clone git://git.carnivore.it/libemu.git libemu
cd libemu
autoreconf -vi
./configure --prefix=/opt/dionaea
make install
cd ..
5. libnl (optional)
git clone git://git.kernel.org/pub/scm/libs/netlink/libnl.git
cd libnl
autoreconf -vi
export LDFLAGS=-Wl,-rpath,/opt/dionaea/lib
./configure --prefix=/opt/dionaea
make
make install
cd ..
6. libev
wget http://dist.schmorp.de/libev/Attic/libev-3.9.tar.gz
tar xfz libev-3.9.tar.gz
rm libev-3.9.tar.gz
cd libev-3.9
./configure --prefix=/opt/dionaea
make install
cd ..
7. Cython
wget http://cython.org/release/Cython-0.12.1.tar.gz
tar xfz Cython-0.12.1.tar.gz
rm Cython-0.12.1.tar.gz
cd Cython-0.12.1
python setup.py build
python setup.py install
8. sqlite3
apt-get install sqlite3
9. Python 3.1.2
wget http://python.org/ftp/python/3.1.2/Python-3.1.2.tgz
tar xfz Python-3.1.2.tgz
rm Python-3.1.2.tgz
cd Python-3.1.2/
./configure --enable-shared --prefix=/opt/dionaea --with-computed-gotos \
--enable-ipv6 LDFLAGS="-Wl,-rpath=/opt/dionaea/lib/"
make
make install
cd ..
10. libxml2-dev
apt-get install libxml2-dev
11. libxslt1-dev
aptitude install libxslt1-dev
12. lxml
wget http://codespeak.net/lxml/lxml-2.2.6.tgz
tar xfz lxml-2.2.6.tgz
rm lxml-2.2.6.tgz
cd lxml-2.2.6
/opt/dionaea/bin/2to3 -w src/lxml/html/_diffcommand.py
/opt/dionaea/bin/2to3 -w src/lxml/html/_html5builder.py
/opt/dionaea/bin/python3 setup.py build
/opt/dionaea/bin/python3 setup.py install
cd ..
13. udns
wget http://www.corpit.ru/mjt/udns/udns_0.0.9.tar.gz
tar xfz udns_0.0.9.tar.gz
rm udns_0.0.9.tar.gz
cd udns-0.0.9/
./configure
make shared
cp udns.h /opt/dionaea/include/
cp *.so* /opt/dionaea/lib/
cd /opt/dionaea/lib
ln -s libudns.so.0 libudns.so
cd /usr/local/src
14. Curl & C-ares
wget http://c-ares.haxx.se/c-ares-1.7.3.tar.gz
tar xfz c-ares-1.7.3.tar.gz
cd c-ares-1.7.3
./configure --prefix=/opt/dionaea
make
make install
cd ..
wget http://curl.haxx.se/download/curl-7.20.0.tar.bz2
tar xfj curl-7.20.0.tar.bz2
rm curl-7.20.0.tar.bz2
cd curl-7.20.0
./configure --prefix=/opt/dionaea
make
make install
cd ..
15. libpcap
wget http://www.tcpdump.org/release/libpcap-1.1.1.tar.gz
tar xfz libpcap-1.1.1.tar.gz
rm libpcap-1.1.1.tar.gz
cd libpcap-1.1.1
./configure --prefix=/opt/dionaea
make
make install
cd ..
16. Dionaea (with my own changes on the Cython line from '/usr/local/bin' to '/usr/bin')
git clone git://git.carnivore.it/dionaea.git dionaea
cd dionaea
autoreconf -vi
./configure --with-lcfg-include=/opt/dionaea/include/ \
--with-lcfg-lib=/opt/dionaea/lib/ \
--with-python=/opt/dionaea/bin/python3.1 \
--with-cython-dir=/usr/bin \
--with-udns-include=/opt/dionaea/include/ \
--with-udns-lib=/opt/dionaea/lib/ \
--with-emu-include=/opt/dionaea/include/ \
--with-emu-lib=/opt/dionaea/lib/ \
--with-gc-include=/usr/include/gc \
--with-ev-include=/opt/dionaea/include \
--with-ev-lib=/opt/dionaea/lib \
--with-nl-include=/opt/dionaea/include \
--with-nl-lib=/opt/dionaea/lib/ \
--with-curl-config=/opt/dionaea/bin/ \
--with-pcap-include=/opt/dionaea/include \
--with-pcap-lib=/opt/dionaea/lib/ \
--with-glib=/opt/dionaea
make
make install
Running Dionaea
cd /opt/dionaea/bin/
./dionaea -l all,-debug -L '*'
Within moments of launching Dionaea connection attempts began pouring in, mostly rejected attempts. After around 30 minutes the first sample was received along with some interesting colours flying past - looking forward to going through the logs later this evening. Now all that's left to do is get the p0f ihandler turned on. So far things are looking promising.
Getting Dionaea up and running has been a great experience. I've learned a lot about compiling, dependencies, issues, and Debian in general. I'm very keen to see what kind of information it can produce over the coming month.
- Cooper
*update: 27th November 2010 - Updated Dionaea Install Instructions
Friday, March 25, 2011
Metasploit Framework
Installation on Ubuntu Linux
The Metasploit Framework is well-supported on the Ubuntu platform. The following instructions should also apply to Kubuntu, Xubuntu, and Debian.
If these instructions do not work for your version of Ubuntu, please try the Generic Linux instructions instead.
Dependencies
Install the Ruby dependencies:
$ sudo apt-get install ruby libopenssl-ruby libyaml-ruby libdl-ruby libiconv-ruby libreadline-ruby irb ri rubygems
Install the Subversion client:
$ sudo apt-get install subversion
In order to build the native extensions (pcaprub, lorcon2, etc), the following packages need to be installed:
$ sudo apt-get install build-essential ruby-dev libpcap-dev
Metasploit Framework
Once the dependencies have been installed, download the Unix tarball from the download page and run the following commands:
$ tar xf framework-3.X.tar.gz
$ sudo mkdir -p /opt/metasploit3
$ sudo cp -a msf3/ /opt/metasploit3/msf3
$ sudo chown root:root -R /opt/metasploit3/msf3
$ sudo ln -sf /opt/metasploit3/msf3/msf* /usr/local/bin/
When you've completed this step, you should have a working installation and be able to run modules, pivot through compromised systems, and use most of the Metasploit Framework's features. The following optional installation steps will give you extra functionality.
Database Configuration (optional)
Now that the framework is installed, you'll want to configure a database connection, and enable the Metasploit Framework to connect to it:
For postgres, see postgres_setup (recommended)
For mysql, see mysql_setup
For sqlite, see sqlite_setup (not supported!!).
Extensions (optional)
The Metasploit Framework includes a few native Ruby extensions that must be compiled in order to use certain types of modules.
To enable raw socket modules:
$ sudo apt-get install libpcap-dev
$ sudo bash
# cd /opt/metasploit3/msf3/external/pcaprub/
# ruby extconf.rb
# make && make install
To enable WiFi modules:
$ sudo bash
# cd /opt/metasploit3/msf3/external/ruby-lorcon2/
# svn co http://802.11ninja.net/svn/lorcon/trunk lorcon2
# cd lorcon2
# ./configure --prefix=/usr && make && make install
# cd ..
# ruby extconf.rb
# make && make install
Updates
The Metasploit Framework is updated daily with the latest exploits, payloads, features, and bug fixes. To update your installation of the Metasploit Framework:
$ sudo svn update /opt/metasploit3/msf3/
This can also be installed into the root user's crontab:
$ sudo crontab -e -u root # enter the line below
1 * * * * /usr/bin/svn update /opt/metasploit3/msf3/ >> /var/log/msfupdate.log 2>&1
Wednesday, February 02, 2011
How To Delete Remembered Network Passwords In Windows
A user asked in the forums about how to delete a cached password that is stored in Windows. When we want to access another computer (specifically Windows), sometimes if the remote computer requires a password to access its resources like files and printers, we have to give the username and password once and then it remains in the Windows Cache until it is restarted or logged off. And if we check the remember password option, then it remains in even after Windows restart. Here’s the method to delete cached Windows Network passwords:
Go to Start Menu –> Run –> control userpasswords2 and press Enter.
User Accounts Dialog Box will appear, Go to Advance Tab and Click on the Manage Password Button. In Stored User Names and Password press the Remove Button and Remove all users information that you want to delete.

Go to Start Menu –> Run –> control userpasswords2 and press Enter.
User Accounts Dialog Box will appear, Go to Advance Tab and Click on the Manage Password Button. In Stored User Names and Password press the Remove Button and Remove all users information that you want to delete.

Subscribe to:
Posts (Atom)
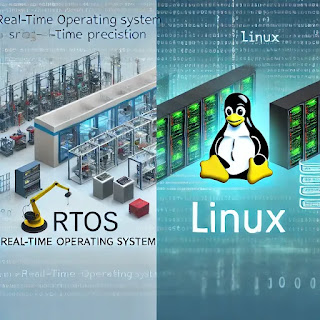
5 Faedah RTOS Linux Kernel - Apa Itu Sistem Operasi Masa Nyata (RTOS) di Malaysia
Di VIENNA dimana selepas 20 Tahun, Real-Time Linux Akhirnya Masuk ke Dalam Kernel Utama Linux. Itulah pada yang memahami bagaimana berkemban...
%20and%20Linux.%20The%20image%20should%20feature%20a%20side-by-side%20comparison,%20with%20one%20half%20representi.webp)